I cannot count my day complete
'Til needle, thread and fabric meet.
~Author Unknown

Sharing a common thread with those who love the art of hand embroidery

Tuesday, January 28, 2014

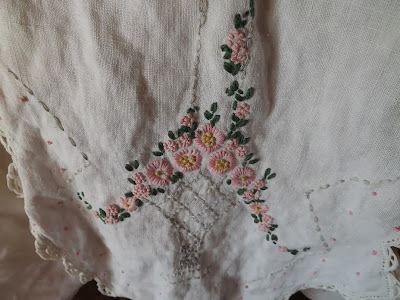
I love seeing embroidered accessories

whether it be for sewing or for some other use.
Since it takes forever for me to finish and to show you something I have created each week and also I have been busy working on my vintage shop,
I want to share a pattern and design with you that you might enjoy making for yourself or for a loved one.
This wonderful traveling accessory comes from the 1940's and  from the pages of Nori Koenig's book Vintage Garden.
I love Nori Koenig books of embroidery designs. You can find a lot of her books on Amazon.
This is a comb and brush pouch and is simple to assemble and beautiful to embroider.

I am hoping that if you click onto the photos, you might be able to copy it for yourself.

To line up the designs just trace off and overlap the designs where it all matches up.
Choose any fabric for the backing and you have a treasure to carry around for a long time!
Enjoy!


Saturday, January 18, 2014

This week I am trying something new and foreign in my embroidery work..............

and I really mean foreign.............
I want to learn the Japanese art of making
these beautiful embroidered balls known as
Temari.


Temari balls are a folk art form that originated in China and was introduced to Japan around the 7th century A.D. "Temari" means "hand ball" in Japanese.

The stitches and the colors are endless.
Temari are highly valued and cherished gifts, symbolizing deep friendship and loyalty. Also, the brilliant colors and threads used are symbolic of wishing the recipient a brilliant and happy life. Traditionally, becoming a craftsman in Japan was a tedious process. Becoming a temari artist in Japan today requires specific training, and one must be tested on one's skills and technique before being acknowledged as a crafter of temari.

Traditionally, temari were often given to children from their parents on New Year's Day. Inside the tightly wrapped layers of each ball, the mother would have placed a small piece of paper with a goodwill wish for her child. The child would never be told what wish his or her mother had made while making the ball.

Alternately, some balls contained "noisemakers" consisting of rice grains or bells to add to the play value. It is said that traditional temari were wrapped so tightly they would bounce.
 

I have spent time watching many videos and I have researched countless books on the subject. One name seemed to stand out when it comes to great teaching of this art and that is the name of Diana Vandervoort. It seems that her books are easy to follow and understand. I chose this book and it just arrived today.

Although Styrofoam balls are used in many of these balls, I also learned that balls made of yarn are easier to stitch on. So I decided to give it a try.

Once the yarn ball is made, sewing thread of your color choice is used to wrap around the ball until it is completely covered.

The ball is then marked and measured with pins and then with string guidelines.
This is as far as I have gotten. I will show more as I learn along the way.
How about you?
Have you heard of this beautiful art form?
Have you created Temari balls?
I would love to hear.............and see!


Tuesday, January 7, 2014

You find a beautiful hand stitched dresser scarf at a shop, and you can't believe how cheap the price is.............

 
then you realize it has heavy stains................
but that's okay.........because you remembered reading on my previous posts

that these stains can be removed............
just by mixing baking soda and hydrogen peroxide together into a runny paste..............

moisten the linen with water,
 
rub the paste mixture gently onto the stain............
let it sit over night..............
gently wash the linen........
and the stain is gone!
 
But that is not the only problem with it...............
there is a big hole in it.............
or in this case,
wax dropped onto it and a hole in it where someone unsuccessfully tried to remove the wax.
Not a problem I say...........buy it, take it home, because this too can be repaired and the linen can once again look beautiful and be used in your home.
 
Here is what you can do..............
First, find fabric that matches the stitched piece in color and in texture.
then, pin this piece on the wrong side of the linen, over the hole. Pencil mark a square big enough around the hole.
Baste a running stitch along the pencil outline of the square.
Now turn over the stitched piece to the right side and carefully
cut away the wax............
 
or trim the loose ends of the hole.........
making sure not to cut the patch material underneath.
 
Now turn under a small edge of the hole and work the blind stitch.......just like an applique around the entire hole, using very small stitches.


Now you have a clean patch over this area.


Turn the stitched piece over to the wrong side again..........remove the basting stitches along the square and
cut the excess fabric  away and leave just enough around the stitching of the hole repair.


With tiny stitches, work a closed buttonhole stitch over the raw edges.
This keeps the patch from fraying and balling up with use and washing over the years.
 

Now, turn it over to find that  you have an almost un noticeable patch on this linen
 

and it can now be used


and displayed for many more years in your home.
 I hope you found this tutorial easy to follow and I hope that when you find lost and forgotten beautiful hand stitched pieces that need some care,
you will take them home to enjoy then like they were meant to be!


Friday, January 3, 2014

Out with the

NEW, and in with the OLD,, this  is my resolution this year.
Because my goal is to have my vintage shop complete and open in 6 months.
I have already stared to work..........doing just a bit every day.
In a corner of my bedroom, boxes filled with an overflow of dishes and glassware lie in wait.

A pile of vintage linens also wait to be pressed and displayed.

I have several sets of pretty dishes,


a truck load full of depression era glassware,
 

and  vintage linens with such beautiful stitch work,

that it is very hard for me to actually let some of these go.............

but that is the whole process of having a vintage shop.............
right?
I will also be selling my own hand embroidered linens.

There will be a collection of vintage cookbooks........
filled with wonderful recipes that we all have grown up to love,

and I am also going to sell my cement creations outside.
Some of you have already requested purchasing some items from me.............and since you all pretty much live far away from me,
I am going  to also show you the items I have for sale.......... here and on my Etsy online shop,
which will allow you to purchase them on line if you would like to do so.

I will probably do this.............way before I have my actual shop open...........
because I have much work to do. I am going to replace broken windows...........
all by myself.............I hope.
I have watched several videos on this............plus I also have the back up help of my husband, if I have a problem.
This is my baby............so I want to do all of the work by myself.

Trying to decide on shop colors has been the hardest thing for me to do. I find this ironic, since I am an embroidery artist and picking colors for a project comes so easily.
But I love the nostalgic look that rust/red and rust/ creams have along with a sage green.  So I think I will paint the shop and it's furnishings in these colors.
What do you think??

Another problem I have to solve is what to do with Zelda...........
my hermit, shop loving cat, that has lived in this space for over  10 years. She has never gotten along with other cats, and gets frantic when I place her inside of our home. She is very loving, but insists on staying in her solitude.
A cat in a vintage glassware shop just will not be a happy match.
So I am going to try to see if she will stay in my embroidery studio.............
I really wanted that space to be "pet free", but I think it will be a good resolution, better than having
a mosaic shop with broken dishware in the end.
So tell me, what are your resolutions this new year?
Are you going to start to a new career?.............or maybe you are starting a business of your own?
Do you have plans to learn a new technique or craft?
I would love to hear!